Keep your headlights clear with car wax! Just wipe ordinary car wax on your headlights. It contains special water repellents that will prevent that messy mixture from accumulating on your lights - lasts 6 weeks.
Squeak-proof your wipers with rubbing alcohol! Wipe the wipers with a cloth saturated with rubbing alcohol or ammonia. This one trick can make badly streaking & squeaking wipers change to near perfect silence & clarity.
Ice-proof your windows with vinegar! Frost on it's way? Just fill a spray bottle with three parts vinegar to one part water & spritz it on all your windows at night. In the morning, they'll be clear of icy mess. Vinegar contains acetic acid, which raises the melting point of water---preventing water from freezing!
Prevent car doors from freezing shut with cooking spray! Spritz cooking oil on the rubber seals around car doors & rub it in with a paper towel. The cooking spray prevents water from melting into the rubber
Fog-proof your windshield with shaving cream! Spray some shaving cream on the inside of your windshield & wipe if off with paper towels. Shaving cream has many of the same ingredients found in commercial defoggers.
De-ice your lock in seconds with hand sanitizer! Just put some hand sanitizer gel on the key & the lock & the problems solved!
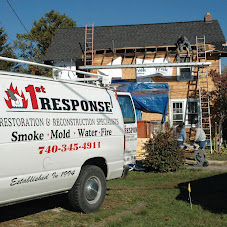
1st Response
Monday, December 6, 2010
Friday, December 3, 2010
Some good Winter tips from 1st Response
Keep your headlights clear with car wax! Just wipe ordinary car wax on your headlights. It contains special water repellents that will prevent that messy mixture from accumulating on your lights - lasts 6 weeks.
Squeak-proof your wipers with rubbing alcohol! Wipe the wipers with a cloth saturated with rubbing alcohol or ammonia. This one trick can make badly streaking & squeaking wipers change to near perfect silence & clarity.
Ice-proof your windows with vinegar! Frost on it's way? Just fill a spray bottle with three parts vinegar to one part water & spritz it on all your windows at night. In the morning, they'll be clear of icy mess. Vinegar contains acetic acid, which raises the melting point of water---preventing water from freezing!
Prevent car doors from freezing shut with cooking spray! Spritz cooking oil on the rubber seals around car doors & rub it in with a paper towel. The cooking spray prevents water from melting into the rubber
Fog-proof your windshield with shaving cream! Spray some shaving cream on the inside of your windshield & wipe if off with paper towels. Shaving cream has many of the same ingredients found in commercial defoggers.
De-ice your lock in seconds with hand sanitizer! Just put some hand sanitizer gel on the key & the lock & the problems solved!
Friday, November 19, 2010
More Winterizing Tips
WINDOWS AND DOORS:
Check windows and doors to prevent air from seeping into your home.
Checking for air gaps is done best on a windy day because you will be able to feel where the drafts are more easily. Light a few incense sticks and run them around door and window openings, watch the smoke trail and if there is a leak it will be real easy to spot.
A small 1/4" gap at the threshold of a door is equal to a 4" hole in the wall!
The rubber insert on thresholds tends to get hard and brittle with age and they tend to collapse so it may be time to replace it.. Most thresholds can simply be removed and a new rubber insert threaded in.
Don't overlook your wall outlets, its amazing how much outside air comes in around the openings.
Quick Fix: Install foam precut pads in behind the plates. Most all home building centers and hardware stores carry them.
Use a good quality caulking compound and seal up any cracks between the side walls of the house and the window frames. Clean and lubricate the window frame channels, if there are any gaps you can seal with one of the many strip adhesive backed weatherstrip available at local home centers and hardware stores.
Clean gutters & downspouts.Check the gutter supports.
Exterior paint-check for peeling, holes, cracks,soft and rotten wood, chalking.
Check siding-hammer in nails that have popped, replace rusty nails with galvanized nails.
Caulk any leaks or cracks in basement walls and seal.
See that all doors and windows close & lock properly. Lubricate hinges and door locks.
Thursday, October 21, 2010
Winter will be here soon
Winter may be a few months away, but now is a great time to start getting ready for it. With energy prices on the rise, it is important to find ways to cut costs and reduce the amount of energy you use in the winter. Let’s go over a few quick ways to help lower your energy costs and get ready for winter.
First, one of the easiest ways to dramatically reduce your home heating costs is by sealing your windows. There are many different kinds of window kits available that will completely seal off any gaps or drafts. Summertime is a great time to purchase these kits since they will typically be marked down by 50% or more. This means instead of spending $5 or more per window, you can do it for about $2.50 a window. If you’ve got a lot of windows in your home, this can really add up.
Summer is also a good time to start thinking about your insulation and the shape it may be in. If your home is fairly new, you should not have to worry about this. However, if you have noticed that no matter what you do your house still feels pretty cold, poor insulation may be the culprit. Look at the R rating on your current insulation and double check to make sure that it is meant for your area. If it is, it may have degraded, or you may need a little more to make your house feel cozy.
If you have a forced air heating system, it’s time to get those filters out and replaced. Having a clean filter in your furnace can reduce your heating costs significantly. Once again, you can take advantage of summer discounts and stock up on filters for the entire year. You should be replacing them at least every month, or more if you live in a particularly dusty area.
Wednesday, August 11, 2010
Some Hot Weather Tips
Some tips to help you keep your home a little cooler during these very hot summer days.
Reduce the cooling load by employing cost-effective conservation measures. Provide effective shade for east and west windows. When possible, delay heat-generating activities such as dishwashing until evening on hot days.
Over most of the cooling season, keep the house closed tight during the day. Don’t let in unwanted heat and humidity. Ventilate at night either naturally or with fans.
You can help get rid of unwanted heat through ventilation if the temperature of the incoming air is 77 F or lower. (This strategy works most effectively at night and on cooler days.) Window fans for ventilation are a good option if used properly. They should be located on the downwind side of the house facing out. A window should be open in each room. Interior doors must remain open to allow air flow.
Use ceiling fans to increase comfort levels at higher thermostat settings. The standard human comfort range for light clothing in the summer is between 72 F and 78 F. To extend the comfort range to 82 F, you need a breeze of about 2.5 ft/sec or 1.7 mph. A slow-turning ceiling-mounted paddle fan can easily provide this air flow.
Try not to use a dehumidifier at the same time your air conditioner is operating. The dehumidifier will increase the cooling load and force the air conditioner to work harder.
Seal all air conditioner ducts, and insulate ducts that run through unheated basements, crawl spaces, and attics.
Keep the thermostat set at 78 degrees F or higher if using ceiling fans. Don’t air-condition unused rooms.
Maintain your air conditioners properly to maximize efficiency.
When an emergency arises, call 1st Response.
Wednesday, July 7, 2010
Some tips for summer living
Light and Airy - Make your home as light as possible. Invest in some thin and sheer curtains that look beautiful, provide privacy and keep the room cool. Heavy, synthetic drapes are definitely a no-no in the summer months. Beautiful cotton drapes in bold patterns and bright colors look good.
Cool Colors - Furnish your home in cool and soothing colors. Use bed sheets and pillow cases in colors like white, crème, yellow, blue, orange etc. Bed spreads and table cloths in vibrant patterns and flowery prints create a airy and relaxed atmosphere in the summer months.
Simplicity - Put away all your heavy and thick carpets that look and feel hot. Instead, invest in small and thin rugs that look good and feel great. Remember - less is more in summers!
Bring Nature to your Home - Seasonal flowers can brighten up your home. Pick flowers from your garden or invest in some fresh flowers for all the rooms of your home. Small, green plants create a cooling effect in your home.
In the afternoons, draw all the curtains of your house. This will automatically cool off the home and keep the heat out.
If you don't already have them, go shopping for some cheery wind chimes. Hang them at the entrance or high up where there is a cross ventilation. Let your home come to life with the soothing sounds of the chimes.
I you should suffer fire damage, smoke damage, water damage or storm damage, remember 1st Response.
Friday, June 18, 2010
Going Away??
If you are going on a week-end trip, business related trip, or a well deserved vacation you don't only need a "things-to-remember" list, but also a "Home To-Do List" as well. You do not want to find yourself in the middle of a business meeting, on the nice sunny beach or even just a 100 or so miles away when you get that panic feeling of "did I forget... did I remember... to do this, to do that?", pay that due bill, leave fresh water and food for the cat, etc.
So, when leaving, make these 4 tasks complete before you go, and also check out our time saving ideas as well.
It is highly suggested that you utilize automatic light timers that work just as well on radios, televisions, to make the home looked lived-in, like you are not away. Stop newspaper delivery for the time you are away, these piled up on your doorstep or end of driveway can be a real sign that your home is empty and no one is there, leaving you wide open and vulnerable. Mail too can be held at your local post office and resume delivery when you return home.
You can also use auto pay for your important bills. Pay utilities online so that the payment will be made via internet through your account, so you can rest assured that you do not miss a payment and a bill is not awaiting your return. You can even call your payments in using your Master or Visa card, and it is a secure way too. By taking the one-time payment option you can assure you will only be charged this one time while you are away enjoying yourself.
Not only do you have to make arrangement for your pets, but your plants as well. You can hire someone to water them or put them near your automatic sprinkler system if you have one. If you must leave your pets at home, make sure you ask a neighbor who is reliable and can feed and give them water daily. I also suggest they have their own vehicle to transport the pets in case of an emergency.
To save on some of the energy billing and reducing costs, turn off gas and water, unplug some of the appliances like the microwaves, televisions and other ones that you will not be utilizing. This also reduced the danger of power surges if you should experience a power outage while you are away. If you have gas stoves, turn off the pilot lights to save even more while you are gone.
There tips, as little as just paying a bill ahead of time, or using auto bill pay to putting lights on automatic timers can save you much stress and anxiety while being away from your home and assuring that your home and pets will be safe upon your return.
Saturday, May 22, 2010
Water Damage: How to protect your home
The first signs of water damage might seem trivial. But warnings like water stains on the ceilings or a leak under the kitchen sink can lead to real problems, like a weakened roof or rotten floorboards. A burst pipe can even damage your furniture and other personal possessions. Why take a chance? Learn where your home is most likely to suffer water damage, and what you can do to help prevent it.
Inside your home
Kitchen
•Dishwasher – Periodically check for leaks under the sink where the hose connects to the water supply. Look around the base of the dishwasher for evidence of leaks, such as discolored, warped, or soft flooring materials, or water damage to nearby cabinets.
•Refrigerator – If your refrigerator has an icemaker, make sure the hose connection is securely attached to the water supply line. Also, a wet spot on the floor may be a sign of a crimped icemaker line about to burst.
•Sink – Replace deteriorated caulk around sinks, and check the pipes under the sink for leaks. A slow-draining pipe may indicate a partially blocked drain that needs cleaning.
Bathroom
•Showers and bathtubs – Remove and replace deteriorated or cracked caulk and grout. Water can leak through these damaged sealants, causing stains or soft areas around nearby walls and floors.
•Sinks – Check under the sink for leaks from water supply lines or drainpipes.
•Toilets – Clogs can result from too much toilet paper or objects such as hanging bowl deodorants. Also, some chlorine tablet cleaners may corrode internal plastic or rubber parts, leading to a leak.
Basement, Laundry or Utility room
•Washing machine – Check hoses regularly for bulging, cracking, fraying, and leaks around hose ends. Replace the hose if a problem is found or every three to five years as part of a proactive maintenance program. To help make sure the hose doesn’t kink, leave at least four inches (or 11 centimeters) between the water connection and the back of the washing machine.
•Water heater – Most water heaters last eight to 15 years. Wet spots on the floor or a rusted tank may signal a leak. Water heaters should be installed on the lowest level of the home, next to a floor drain, or inside a drain pan piped to the floor drain.
•Sump pump – Battery-operated back-up sump pumps can help protect against power failure or failure of the primary pump. Test the sump pump before the start of each wet season. Sump pumps are not intended to last more than 10 years and must have some components replaced or serviced within those 10 years.
Since water may still come through an overflowing drain or cracks in the foundation walls, make sure items stored in the basement are kept off the floor. Furniture should be on casters or shims and arranged away from floor drains.
Stopping leaks at the source
•Check for hidden leaks. First, turn off faucets and all water-using appliances, and don’t flush toilets for one hour. Then, record the water meter reading. If the flow indicator (triangular or diamond-shaped rotating button) is spinning or the meter reading has changed while no water is being used, a leaking pipe may exist.
•Make sure everyone in your household knows where the water shutoff valve is and how to open and close it. Check it frequently for problems, and shut off the water if you will be away from your home for several days or longer.
Tuesday, May 4, 2010
After the Flood Tips
1.Exercise caution when first entering your home. If there is still standing water, it is prudent to wear rubber boots and gloves. Turn the electricity off at the breaker box and get all electrical appliances and extension cords up on higher ground dry them out. Make sure your home is structurally safe, which means looking out for broken sharp objects on the floor and anything you might trip over.
2.Boil all drinking water or use bottled water. All drinking water should be either boiled, put through a water purifier or use bottled water. Areas that are dry but have been exposed to sewage should be thoroughly washed down with a solution of household bleach and water. We recommend a 25% bleach to water solution.
3.If in doubt, throw it out. Toss out all water damaged rugs, particle board furniture, mattresses, suitcases, food, even photographs and books, and follow your local authority guidelines for disposal. Many electrical appliances will not survive if they have been submerged in water. Dishwashers, refrigerators and vacuum cleaners are cheaper to replace than repair. Use rubber gloves and mask to clean loose debris to not inhale any toxic particles.
4.Wash and dry everything you can. This includes water soaked bedding, towels, drapes, cushions and clothing using the hot sanitizing cycle on your washing machine. Dry clean heat sensitive textiles. Put dishes through the dishwasher on hot cycle.
5.Remove remaining water and dehumidify damp areas. Clean up the last standing water with a portable submersible sump pump and a wet dry vac. Then use a high capacity, low temperature dehumidifier to take care of the rest. An auxiliary or built in pump makes this task a lot easier. It is important to open windows and ventilate rather than turn on the heat high [about 50°F] in the house or use fans, which is an invitation to grow mold spores and spread them around the house. Do not try to dry out the house too quickly, because if you do it will cause wood floors to warp and buckle.
6.Clean all surfaces thoroughly. Wash down all surfaces, such walls, cabinets, basement floors including those which were not in direct flood contact with your bleach solution. Then wipe down with clear water. Using a vapor steam cleaner on all surfaces to disinfect is an even better solution.
7.Check for interior and structural damage. Remove dry wall up to and 2 feet above flood levels on walls and remove all insulation which came in contact with flood waters. It is imperative to do this if you want to avoid future mold problems. We have heard too many horror stories from people whose houses became infested with toxic mold - so it is not worth taking a chance and skipping this step. Replace hardwood flooring especially all sub floors if they have been flood soaked. Keep ventilating with fresh air until the house is completely dry. Have the duct work professionally cleaned after the house has dried out.
8. Inspect your electrical and plumbing systems. Have an HVAC professional inspect your electrical systems and appliances. Replace all filters and switches. Check your furnace, as a burnout of the motor may be imminent. Make sure your plumbing and toilet facilities are working.
Tuesday, April 13, 2010
Summer Tips
Some handy tips from 1st Response, when an emergency arises, think of 1st Response, a Full Service Contractor
Furniture Care
Outdoor tables, chairs, and lawn chaises are built from materials that are generally tough enough to withstand sun, rain, and wind. Day to day, they require little more than frequent hosing off. Specialized care is required, however, when stains, scuffs, and scrapes appear. In many cases, cleaners and waxes designed for the care of cars, boats, and decks are appropriate for use on outdoor furnishings. At the end of the season, cover outdoor furnishings with canvas or cotton sheeting to keep them free of dust and protected from moisture. Store the furniture in a shed, a garage, or on a covered porch. Or, if it can't be kept in a protected area, wrap it well in waterproof tarps designed for outdoor storage of furniture.
Fabric
Outdoor woven fabrics generally undergo a chemical treatment during manufacturing to increase stain and moisture resistance, regardless of whether they are made from synthetic fibers, such as vinyl-coated polyester or acrylic, or from cotton blends.
Once a week, hose fabrics down to remove dust, dirt, and body oils. To deep clean, scrub with a utility brush and a solution of mild soap, such as Dr. Bronner's, and lukewarm water. Avoid detergents and hot water, which can strip the protective coating off of outdoor fabrics. If fabrics are badly stained or mildewed, scrub with a solution of 1/ 2 cup oxygen bleach and 5 gallons of warm water.
Cushions
Store all outdoor cushions in a covered area to protect them from rain. If cushions become wet, stand them on end to expedite drying.
Umbrellas
Rinse regularly with a spray hose throughout the outdoor season, or all year if you live in a warm climate or humid environment. If mildew is present, remove the cover from the frame, if possible, and brush away any mildew.
If the label says "machine-washable," place it in a washing machine filled with cold water and a cup of oxygen bleach. Agitate to mix and let the cover sit overnight. Next, drain the water and spin, then launder the cover in cold water using mild soap such as Dr. Bronner's. Return it to the frame, in the open position, to dry in the sun.
Awnings
Rinse regularly with a spray hose throughout the outdoor season. Allow the awning to air-dry thoroughly after cleaning; always open awnings after rain to let them dry thoroughly. For a deep cleaning, first rinse the awning, then use a long-handled brush to apply a solution of water and mild soap, such as Dr. Bronner's. Rinse again. Clean awnings thoroughly and let them dry completely before storing. Store awnings off the ground to lessen the chance that they will become winter homes for rodents.
Driveways, Walks, and Patios
Although driveways and walks are utilitarian, they are extensions of the home, and one of the first things people see when entering your property. Regular care of these areas will prevent them from becoming damaged or unsightly. Sweep weekly with an outdoor push or corn broom or rinse with a hose to keep surfaces clean.
Routine care of Decks
Every week, sweep deck floors and thresholds with an outdoor push broom (or more frequently, if necessary) to remove leaves and other debris. Dust railings and windowsills with a counter brush.
Always shovel your deck after snowstorms. The weight of snow can damage the deck and the excess moisture can harm untreated wood.
Seasonal Maintenance
To wash a deck by hand, first sweep thoroughly and use an old saw blade or putty knife to remove any debris caught between the boards. Next, hose down the deck and scrub it with a long-handled deck brush and a solution of all-purpose cleaner and water, working in strokes that run parallel to the grain of the boards. For tough stains, use a commercial deck brightener or oxalic acid, which lighten dingy, gray wood.
If you have a large deck or porch, a power washer saves time. This machine uses high-pressured water to blast away dirt, mildew, and some stains. However, power washers can open the pores in untreated wood surfaces, exposing the surface to the elements and decreasing the deck's life span.
Once the deck is clean, check for wobbly nails that may have come loose over the winter. Remove them, and replace with galvanized, all-purpose deck screws, which are less likely to pop out of wood than nails are. Fill holes with wood filler, and sand smooth. Carry out any other repairs, such as replacing a splintered or warped board, before the damage worsens.
Once a year (or when drops of water no longer bead on the surface but are absorbed into the wood), coat the deck with a water-based waterproofing sealer. Choose a sealer that contains a UV protector to help block the sun's damaging ultraviolet rays.
If an EMERGENCY arises, 1st Response is just a phone call away. 24/7 Personal Care.
Thursday, March 18, 2010
Spring Cleaning Tips
INSIDE
CLEAN CARPETS as soon as the spring mud season is over. Vacuum them thoroughly, then shampoo with a spray foam or powder or rent a steamer from a hardware store for an even deeper clean.
CLEAN AND VENTILATE THE BASEMENT. Open windows and give your cellar a good airing, then sweep the area thoroughly or vacuum.
START UP YOUR DEHUMIDIFIER. Clean it, make sure that it's in working order, then run it in a humid basement or partially underground room. Dampness during spring and summer months causes mildew.
OUTSIDE
IF YOU HAVE A SWIMMING POOL, ensure that cleaning equipment is in good shape and your water-testing kit is complete. Stock up on chemicals. If you lowered the water level in the fall, fill the pool now.
PUT UP WINDOW BOXES. Dump out old soil and clean the boxes thoroughly. Line wooden boxes with garbage bags to protect them from moisture. Make sure there are drainage holes. Replant with potting soil.
INSTALL WINDOW-UNIT AIR CONDITIONERS. Carefully go over the unit with the brush attachment of your vacuum. Remove and wash the filter and let it dry completely, then reinstall it.
FERTILIZE YOUR LAWN A high-nitrogen fertilizer should be applied twice a year, once in spring and again later in fall. If a weed killer is needed, try an organic brand.
1st Response
Restoration and Reconstruction Specialists
Water - Fire - Smoke - Mold
Tuesday, March 16, 2010
Getting Rid of Water Damage
If your home is ravaged by water damage, here are some things you can do to fix the situation.
•Find the source of the water and fix it. Most often, water damage comes from leaks from pipes or drainage. Get yourself one of those cement glues specifically made for covering up leaky pipes and you should do fine. Remember to turn off your water source first before trying to find and fix the leak.
•Get rid of any excess water. You can do this by simply mopping the entire wet area. If mops don't work, then try using a vacuum cleaner. Do this as quickly as possible. The faster you can clean the water up, the less likely it is mold and mildew will develop. If the water damage is particularly large, take pictures of the damage prior to cleaning it up for the insurance company to cover.
•Let in proper ventilation or turn up the air conditioner. Doing so will prevent the growth of molds and mildew. Proper ventilation will also cause cloth or cloth-like fibers to dry faster if the water damage has affected them.
•Call in the professionals. The best way to get rid of water damage is to hire professional cleaners. They will assure that your home and furniture will be handled with the utmost care.
Water damage to your house should never be taken lightly. Your house is one of your biggest investments. You should take care of it so it will remain standing, clean, and intact.
Signs of Water Damage
Does your house have any water damage?
Check for these warning signs right away so you can identify and stop the problem before it gets worse.
•Standing water on the floor. The most obvious sign of impending water damage are pools of water on the floor, most usually in the kitchen. These pools of water indicate that there's a continuous leak somewhere and it has been escaping the normal process of evaporation. If you've already mopped up standing water on your floor and then find some again the next couple of days, then put the mop aside and start looking for leaks or drips. You can mop all you want but as long as you don't fix the source, you will always end up doing the same thing. Your floor will also get damaged day after day.
•Indicators in the house's structure. If your floor begins to buckle slightly, then water is probably present. The reason for this is that vinyl floors are laid over particleboard underlayment that absorbs water and then swells up. If you have hardwood floors, water cups up around the tongue-and-groove joints.
The most common area where water damage is seen is the bathroom in front of the tub or shower --- the damage can occur from splashing or where people step in and out with dripping feet. Keep an eye out for any buckling.
For drywall, check for a discolored or slightly swollen appearance since drywall softens and breaks down.
•Appearance of stains. Next to standing water, the appearance of stains in several parts of your house is a good indication that you have a leak or water encroachment somewhere. The stains may appear:
•Around the windows or on the bottom of the exterior doors, indicating that the water is coming from the outside;
•At the joint between the exterior wall and the ceiling --- it can also mean an ice-damming problem;
•Anywhere in the ceiling, which is almost an indication of a roof leak, unless you have installed water lines in your attic. If you see stains on your ceiling, remember that it does not mean the leak is right above it. Usually, it originates higher and just drips down.
•In cabinets that house a sink --- an indication of a leak in the sink drain system or from the trap.
•Where there are mildew and mold stains. While not exactly definitive proof of a leak, the presence of mildew or molds indicates moisture. In a bathroom where moisture is prevalent, it's an indication that you just don't have enough ventilation to rid the room of mildew. If you see them at the bottom of an exterior wall, it might mean that water is coming in. In closets or places where there is little or no air circulation present, it could mean an overly damp crawl space.
Wednesday, February 17, 2010
Part TWO - Removing Ice from Sloped Roofs
When is there a problem?
The lower the slope, the greater the weight problem. During the ‘98 ice storm many flat roofs had 15 cm (6 in.) of solid ice, while most sloped roofs had little more than 5 cm (2 in.). Most of the ice collected at roof junctions, behind obstructions such as chimneys or skylights, and at roof edges. Drainage, not removal, solved the problem in most cases.
The information in Signs of Stress will help you decide if weight is causing problems on your roof. If your house doesn’t show signs of stress, then there is no need to remove all the ice.
Drainage
On a sloped roof, your goal is to make drainage paths through the ice on the lower edge of the roof. That’s where most ice dam and water back-up problems occur. Always shovel off loose snow to expose the ice.
If you have power and electric heating cables, making drainage paths is fairly easy. Attach loops of electrical roof de-icing cables to one or more long boards. With ropes tied to the board and thrown over the roof, pull the board up beyond the ice dam, letting the electrical loops hang slightly off the edge of the roof.
If you want drainage paths higher on the roof, use bundled loops of electrical de-icing cables. They can be drawn high on the roof. Make sure that they hang off the edge of the roof so you get complete water drainage.
You can use chemical de-icers on the edge of the roof. Clear the snow. At about every three feet along the edge of the roof, break the ice crust just above the ice block on the edge of the roof. Put de-icer in each hole above the ice dam and in a vertical line down to the edge of the roof. Use noncorrosive de-icers (see De-icers) and use as little de-icer as possible. Repeat as necessary rather than overdoing it the first time.
Removal
Removing ice mechanically from a sloped roof is always dangerous — both for the person doing it and for the roof. Removing ice will probably invalidate your shingle warranty. If ice must be removed, have it done by 1st Response, 740-345-4911. They have the proper equipment and training.
Researchers learned a great deal about removing ice from sloped roofs by mechanical means in the winter of 1998. The most important lesson: always start at the top and work down. Starting on the bottom can release ice above you that can slide down and hit you. Small bumps of ice that remain on shingles are caught by ice blocks sliding down. As they slide, they catch and rip off the shingles.
Working from the top down allows you to use the ice on the roof as a slide for the ice that is being freed. Use a sledge hammer rather than an ax.The flexibility of the roof deck will cause the ice to fracture and you will not cut into the shingles.
Freezing Rain
Freezing rain is caused when there is a particular atmospheric “sandwich” of cold and warm air. Precipitation, usually snow, is formed in cold air high up in the atmosphere. As it falls, it travels through a layer of warm air that thaws it into light rain. Just before it hits ground level, it moves into another layer of cold air that brings its temperature to below freezing, but it doesn’t have time or the conditions necessary to crystallize yet. When it hits an object, it immediately freezes.
Snow will collect and then fall off wires and tree branches, and remain relatively light as it accumulates on roofs. Freezing rain compacts into tenacious ice that can weigh almost as much as water. The ice storm of 1998 was in fact a continuous series of small storms, one right after the other, that deposited up to 15 cm (6 in.) of ice on tree twigs, telephone wires, electrical lines and roofs. There is no way to stop freezing rain and it is not generally considered a hazard unless it becomes unusually thick.
The 1998 ice storm created two problems: direct weight and blockage of the natural flow of rain and melting ice. The freezing rain stuck all over the roof, not just on the bottom edge, and created ice dams. The dams backed up run-off water just about anywhere on the roof. Flat roofs suffered serious weight problems, while sloped roofs tended to suffer more water-penetration damage.
1st Response
Part ONE - Removing Ice on Roofs
The ice storm that hit eastern Canada in January, 1998 was a laboratory for concentrated research into severe ice accumulation on roofs.
Removing ice on roofs describes some of the techniques developed from the research for dealing with extensive roof icing and ice dam problems.
Please note: Some of these techniques are for skilled tradespeople only. Call 740-345-4911 for additional information. No ice problem on your roof is serious enough to risk broken bones — or worse.
The balance between removing ice and damaging the roof
Thick ice is hard to remove.You must decide if trying to remove it will cause more damage than leaving it on the roof. Tools, such as hammers, shovels, scrapers, chain saws, and devices such as shoes with ice spikes can damage roofing materials or the structure below. Chemical de-icers can discolor shingles, break down membranes and corrode flashings and drains. De-icers can also damage plants on the ground.
What to do in an ice storm emergency
First: Observe and evaluate the situation every day. Is the ice causing a structural problem? Is there water damage? Do you have to do anything?
Second: Evaluate your capabilities and limits. Do you have the equipment, the agility and the help to work safely and efficiently? If you don’t, get professional help before the situation becomes urgent.
Third: To prevent damage, do as little as possible. Total clearing has the greatest potential for damage to the roof and to people and property below. Often, clearing dangerous overhangs and icicles and making drainage paths is enough.
1st Response
Thursday, January 14, 2010
Winter Advice
An average of a quarter-million families have their homes ruined and their lives disrupted each winter, all because of water pipes that freeze and burst.
And recovering from frozen pipes is not simple. An eighth-inch (three millimeter) crack in a pipe can spew up to 250 gallons (946 liters) of water a day. Both plastic (PVC) and copper pipes can burst.
By taking a few simple precautions, you can save yourself the mess, money and aggravation frozen pipes cause.
Before the cold hits (almost too late for this, but WINTER is not over...
Insulate pipes in your home's crawl spaces and attic. These exposed pipes are most susceptible to freezing. Remember - the more insulation you use, the better protected your pipes will be.
Heat tape or thermostatically-controlled heat cables can be used to wrap pipes. Be sure to use products approved by an independent testing organization, such as Underwriters Laboratories Inc., and only for the use intended (exterior or interior). Closely follow all manufacturers' installation and operation instructions.
Seal leaks that allow cold air inside near where pipes are located. Look for air leaks around electrical wiring, dryer vents and pipes. Use caulk or insulation to keep the cold out and the heat in. With severe cold, even a tiny opening can let in enough cold air to cause a pipe to freeze.
Disconnect garden hoses and, if practical, use an indoor valve to shut off and drain water from pipes leading to outside faucets. This reduces the chance of freezing in the short span of pipe just inside the house.
When the mercury drops
A trickle of hot and cold water might be all it takes to keep your pipes from freezing. Let warm water drip overnight, preferably from a faucet on an outside wall.
Open cabinet doors to allow heat to get to uninsulated pipes under sinks and appliances near exterior walls.
Before you go away
Set the thermostat in your house no lower than 55°F (12°C).
Ask a friend or neighbor to check your house daily to make sure it's warm enough to prevent freezing or
Shut off and drain the water system. Be aware that if you have a fire protection sprinkler system in your house, it will be deactivated when you shut off the water.
If your pipes freeze
Don't take chances. If you turn on your faucets and nothing comes out, leave the faucets turned on and call 1st Response. If you detect that your water pipes have frozen and burst, turn off the water at the main shut-off valve in the house; leave the water faucets turned on. (Make sure everyone in your family knows where the water shut-off valve is and how to open and close it.)
Never try to thaw a pipe with a torch or other open flame. Water damage is preferable to burning down your house. You may be able to thaw a frozen pipe with the warm air from a hair dryer. Start by warming the pipe as close to the faucet as possible, working toward the coldest section of pipe. Do not use electrical appliances in areas of standing water because you could be electrocuted.
Subscribe to:
Posts (Atom)