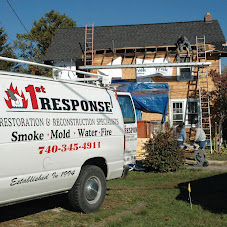
The first signs of water damage might seem trivial. But warnings like water stains on the ceilings or a leak under the kitchen sink can lead to real problems, like a weakened roof or rotten floorboards. A burst pipe can even damage your furniture and other personal possessions. Why take a chance? Learn where your home is most likely to suffer water damage, and what you can do to help prevent it.
Inside your home
Kitchen
•Dishwasher – Periodically check for leaks under the sink where the hose connects to the water supply. Look around the base of the dishwasher for evidence of leaks, such as discolored, warped, or soft flooring materials, or water damage to nearby cabinets.
•Refrigerator – If your refrigerator has an icemaker, make sure the hose connection is securely attached to the water supply line. Also, a wet spot on the floor may be a sign of a crimped icemaker line about to burst.
•Sink – Replace deteriorated caulk around sinks, and check the pipes under the sink for leaks. A slow-draining pipe may indicate a partially blocked drain that needs cleaning.
Bathroom
•Showers and bathtubs – Remove and replace deteriorated or cracked caulk and grout. Water can leak through these damaged sealants, causing stains or soft areas around nearby walls and floors.
•Sinks – Check under the sink for leaks from water supply lines or drainpipes.
•Toilets – Clogs can result from too much toilet paper or objects such as hanging bowl deodorants. Also, some chlorine tablet cleaners may corrode internal plastic or rubber parts, leading to a leak.
Basement, Laundry or Utility room
•Washing machine – Check hoses regularly for bulging, cracking, fraying, and leaks around hose ends. Replace the hose if a problem is found or every three to five years as part of a proactive maintenance program. To help make sure the hose doesn’t kink, leave at least four inches (or 11 centimeters) between the water connection and the back of the washing machine.
•Water heater – Most water heaters last eight to 15 years. Wet spots on the floor or a rusted tank may signal a leak. Water heaters should be installed on the lowest level of the home, next to a floor drain, or inside a drain pan piped to the floor drain.
•Sump pump – Battery-operated back-up sump pumps can help protect against power failure or failure of the primary pump. Test the sump pump before the start of each wet season. Sump pumps are not intended to last more than 10 years and must have some components replaced or serviced within those 10 years.
Since water may still come through an overflowing drain or cracks in the foundation walls, make sure items stored in the basement are kept off the floor. Furniture should be on casters or shims and arranged away from floor drains.
Stopping leaks at the source
•Check for hidden leaks. First, turn off faucets and all water-using appliances, and don’t flush toilets for one hour. Then, record the water meter reading. If the flow indicator (triangular or diamond-shaped rotating button) is spinning or the meter reading has changed while no water is being used, a leaking pipe may exist.
•Make sure everyone in your household knows where the water shutoff valve is and how to open and close it. Check it frequently for problems, and shut off the water if you will be away from your home for several days or longer.
Saturday, May 22, 2010


Tuesday, May 4, 2010
After the Flood Tips
1.Exercise caution when first entering your home. If there is still standing water, it is prudent to wear rubber boots and gloves. Turn the electricity off at the breaker box and get all electrical appliances and extension cords up on higher ground dry them out. Make sure your home is structurally safe, which means looking out for broken sharp objects on the floor and anything you might trip over.
2.Boil all drinking water or use bottled water. All drinking water should be either boiled, put through a water purifier or use bottled water. Areas that are dry but have been exposed to sewage should be thoroughly washed down with a solution of household bleach and water. We recommend a 25% bleach to water solution.
3.If in doubt, throw it out. Toss out all water damaged rugs, particle board furniture, mattresses, suitcases, food, even photographs and books, and follow your local authority guidelines for disposal. Many electrical appliances will not survive if they have been submerged in water. Dishwashers, refrigerators and vacuum cleaners are cheaper to replace than repair. Use rubber gloves and mask to clean loose debris to not inhale any toxic particles.
4.Wash and dry everything you can. This includes water soaked bedding, towels, drapes, cushions and clothing using the hot sanitizing cycle on your washing machine. Dry clean heat sensitive textiles. Put dishes through the dishwasher on hot cycle.
5.Remove remaining water and dehumidify damp areas. Clean up the last standing water with a portable submersible sump pump and a wet dry vac. Then use a high capacity, low temperature dehumidifier to take care of the rest. An auxiliary or built in pump makes this task a lot easier. It is important to open windows and ventilate rather than turn on the heat high [about 50°F] in the house or use fans, which is an invitation to grow mold spores and spread them around the house. Do not try to dry out the house too quickly, because if you do it will cause wood floors to warp and buckle.
6.Clean all surfaces thoroughly. Wash down all surfaces, such walls, cabinets, basement floors including those which were not in direct flood contact with your bleach solution. Then wipe down with clear water. Using a vapor steam cleaner on all surfaces to disinfect is an even better solution.
7.Check for interior and structural damage. Remove dry wall up to and 2 feet above flood levels on walls and remove all insulation which came in contact with flood waters. It is imperative to do this if you want to avoid future mold problems. We have heard too many horror stories from people whose houses became infested with toxic mold - so it is not worth taking a chance and skipping this step. Replace hardwood flooring especially all sub floors if they have been flood soaked. Keep ventilating with fresh air until the house is completely dry. Have the duct work professionally cleaned after the house has dried out.
8. Inspect your electrical and plumbing systems. Have an HVAC professional inspect your electrical systems and appliances. Replace all filters and switches. Check your furnace, as a burnout of the motor may be imminent. Make sure your plumbing and toilet facilities are working.
2.Boil all drinking water or use bottled water. All drinking water should be either boiled, put through a water purifier or use bottled water. Areas that are dry but have been exposed to sewage should be thoroughly washed down with a solution of household bleach and water. We recommend a 25% bleach to water solution.
3.If in doubt, throw it out. Toss out all water damaged rugs, particle board furniture, mattresses, suitcases, food, even photographs and books, and follow your local authority guidelines for disposal. Many electrical appliances will not survive if they have been submerged in water. Dishwashers, refrigerators and vacuum cleaners are cheaper to replace than repair. Use rubber gloves and mask to clean loose debris to not inhale any toxic particles.
4.Wash and dry everything you can. This includes water soaked bedding, towels, drapes, cushions and clothing using the hot sanitizing cycle on your washing machine. Dry clean heat sensitive textiles. Put dishes through the dishwasher on hot cycle.
5.Remove remaining water and dehumidify damp areas. Clean up the last standing water with a portable submersible sump pump and a wet dry vac. Then use a high capacity, low temperature dehumidifier to take care of the rest. An auxiliary or built in pump makes this task a lot easier. It is important to open windows and ventilate rather than turn on the heat high [about 50°F] in the house or use fans, which is an invitation to grow mold spores and spread them around the house. Do not try to dry out the house too quickly, because if you do it will cause wood floors to warp and buckle.
6.Clean all surfaces thoroughly. Wash down all surfaces, such walls, cabinets, basement floors including those which were not in direct flood contact with your bleach solution. Then wipe down with clear water. Using a vapor steam cleaner on all surfaces to disinfect is an even better solution.
7.Check for interior and structural damage. Remove dry wall up to and 2 feet above flood levels on walls and remove all insulation which came in contact with flood waters. It is imperative to do this if you want to avoid future mold problems. We have heard too many horror stories from people whose houses became infested with toxic mold - so it is not worth taking a chance and skipping this step. Replace hardwood flooring especially all sub floors if they have been flood soaked. Keep ventilating with fresh air until the house is completely dry. Have the duct work professionally cleaned after the house has dried out.
8. Inspect your electrical and plumbing systems. Have an HVAC professional inspect your electrical systems and appliances. Replace all filters and switches. Check your furnace, as a burnout of the motor may be imminent. Make sure your plumbing and toilet facilities are working.
Tuesday, April 13, 2010
Summer Tips
Some handy tips from 1st Response, when an emergency arises, think of 1st Response, a Full Service Contractor
Furniture Care
Outdoor tables, chairs, and lawn chaises are built from materials that are generally tough enough to withstand sun, rain, and wind. Day to day, they require little more than frequent hosing off. Specialized care is required, however, when stains, scuffs, and scrapes appear. In many cases, cleaners and waxes designed for the care of cars, boats, and decks are appropriate for use on outdoor furnishings. At the end of the season, cover outdoor furnishings with canvas or cotton sheeting to keep them free of dust and protected from moisture. Store the furniture in a shed, a garage, or on a covered porch. Or, if it can't be kept in a protected area, wrap it well in waterproof tarps designed for outdoor storage of furniture.
Fabric
Outdoor woven fabrics generally undergo a chemical treatment during manufacturing to increase stain and moisture resistance, regardless of whether they are made from synthetic fibers, such as vinyl-coated polyester or acrylic, or from cotton blends.
Once a week, hose fabrics down to remove dust, dirt, and body oils. To deep clean, scrub with a utility brush and a solution of mild soap, such as Dr. Bronner's, and lukewarm water. Avoid detergents and hot water, which can strip the protective coating off of outdoor fabrics. If fabrics are badly stained or mildewed, scrub with a solution of 1/ 2 cup oxygen bleach and 5 gallons of warm water.
Cushions
Store all outdoor cushions in a covered area to protect them from rain. If cushions become wet, stand them on end to expedite drying.
Umbrellas
Rinse regularly with a spray hose throughout the outdoor season, or all year if you live in a warm climate or humid environment. If mildew is present, remove the cover from the frame, if possible, and brush away any mildew.
If the label says "machine-washable," place it in a washing machine filled with cold water and a cup of oxygen bleach. Agitate to mix and let the cover sit overnight. Next, drain the water and spin, then launder the cover in cold water using mild soap such as Dr. Bronner's. Return it to the frame, in the open position, to dry in the sun.
Awnings
Rinse regularly with a spray hose throughout the outdoor season. Allow the awning to air-dry thoroughly after cleaning; always open awnings after rain to let them dry thoroughly. For a deep cleaning, first rinse the awning, then use a long-handled brush to apply a solution of water and mild soap, such as Dr. Bronner's. Rinse again. Clean awnings thoroughly and let them dry completely before storing. Store awnings off the ground to lessen the chance that they will become winter homes for rodents.
Driveways, Walks, and Patios
Although driveways and walks are utilitarian, they are extensions of the home, and one of the first things people see when entering your property. Regular care of these areas will prevent them from becoming damaged or unsightly. Sweep weekly with an outdoor push or corn broom or rinse with a hose to keep surfaces clean.
Furniture Care
Outdoor tables, chairs, and lawn chaises are built from materials that are generally tough enough to withstand sun, rain, and wind. Day to day, they require little more than frequent hosing off. Specialized care is required, however, when stains, scuffs, and scrapes appear. In many cases, cleaners and waxes designed for the care of cars, boats, and decks are appropriate for use on outdoor furnishings. At the end of the season, cover outdoor furnishings with canvas or cotton sheeting to keep them free of dust and protected from moisture. Store the furniture in a shed, a garage, or on a covered porch. Or, if it can't be kept in a protected area, wrap it well in waterproof tarps designed for outdoor storage of furniture.
Fabric
Outdoor woven fabrics generally undergo a chemical treatment during manufacturing to increase stain and moisture resistance, regardless of whether they are made from synthetic fibers, such as vinyl-coated polyester or acrylic, or from cotton blends.
Once a week, hose fabrics down to remove dust, dirt, and body oils. To deep clean, scrub with a utility brush and a solution of mild soap, such as Dr. Bronner's, and lukewarm water. Avoid detergents and hot water, which can strip the protective coating off of outdoor fabrics. If fabrics are badly stained or mildewed, scrub with a solution of 1/ 2 cup oxygen bleach and 5 gallons of warm water.
Cushions
Store all outdoor cushions in a covered area to protect them from rain. If cushions become wet, stand them on end to expedite drying.
Umbrellas
Rinse regularly with a spray hose throughout the outdoor season, or all year if you live in a warm climate or humid environment. If mildew is present, remove the cover from the frame, if possible, and brush away any mildew.
If the label says "machine-washable," place it in a washing machine filled with cold water and a cup of oxygen bleach. Agitate to mix and let the cover sit overnight. Next, drain the water and spin, then launder the cover in cold water using mild soap such as Dr. Bronner's. Return it to the frame, in the open position, to dry in the sun.
Awnings
Rinse regularly with a spray hose throughout the outdoor season. Allow the awning to air-dry thoroughly after cleaning; always open awnings after rain to let them dry thoroughly. For a deep cleaning, first rinse the awning, then use a long-handled brush to apply a solution of water and mild soap, such as Dr. Bronner's. Rinse again. Clean awnings thoroughly and let them dry completely before storing. Store awnings off the ground to lessen the chance that they will become winter homes for rodents.
Driveways, Walks, and Patios
Although driveways and walks are utilitarian, they are extensions of the home, and one of the first things people see when entering your property. Regular care of these areas will prevent them from becoming damaged or unsightly. Sweep weekly with an outdoor push or corn broom or rinse with a hose to keep surfaces clean.
Routine care of Decks
Every week, sweep deck floors and thresholds with an outdoor push broom (or more frequently, if necessary) to remove leaves and other debris. Dust railings and windowsills with a counter brush.
Always shovel your deck after snowstorms. The weight of snow can damage the deck and the excess moisture can harm untreated wood.
Seasonal Maintenance
To wash a deck by hand, first sweep thoroughly and use an old saw blade or putty knife to remove any debris caught between the boards. Next, hose down the deck and scrub it with a long-handled deck brush and a solution of all-purpose cleaner and water, working in strokes that run parallel to the grain of the boards. For tough stains, use a commercial deck brightener or oxalic acid, which lighten dingy, gray wood.
If you have a large deck or porch, a power washer saves time. This machine uses high-pressured water to blast away dirt, mildew, and some stains. However, power washers can open the pores in untreated wood surfaces, exposing the surface to the elements and decreasing the deck's life span.
Once the deck is clean, check for wobbly nails that may have come loose over the winter. Remove them, and replace with galvanized, all-purpose deck screws, which are less likely to pop out of wood than nails are. Fill holes with wood filler, and sand smooth. Carry out any other repairs, such as replacing a splintered or warped board, before the damage worsens.
Once a year (or when drops of water no longer bead on the surface but are absorbed into the wood), coat the deck with a water-based waterproofing sealer. Choose a sealer that contains a UV protector to help block the sun's damaging ultraviolet rays.
If an EMERGENCY arises, 1st Response is just a phone call away. 24/7 Personal Care.
Always shovel your deck after snowstorms. The weight of snow can damage the deck and the excess moisture can harm untreated wood.
Seasonal Maintenance
To wash a deck by hand, first sweep thoroughly and use an old saw blade or putty knife to remove any debris caught between the boards. Next, hose down the deck and scrub it with a long-handled deck brush and a solution of all-purpose cleaner and water, working in strokes that run parallel to the grain of the boards. For tough stains, use a commercial deck brightener or oxalic acid, which lighten dingy, gray wood.
If you have a large deck or porch, a power washer saves time. This machine uses high-pressured water to blast away dirt, mildew, and some stains. However, power washers can open the pores in untreated wood surfaces, exposing the surface to the elements and decreasing the deck's life span.
Once the deck is clean, check for wobbly nails that may have come loose over the winter. Remove them, and replace with galvanized, all-purpose deck screws, which are less likely to pop out of wood than nails are. Fill holes with wood filler, and sand smooth. Carry out any other repairs, such as replacing a splintered or warped board, before the damage worsens.
Once a year (or when drops of water no longer bead on the surface but are absorbed into the wood), coat the deck with a water-based waterproofing sealer. Choose a sealer that contains a UV protector to help block the sun's damaging ultraviolet rays.
If an EMERGENCY arises, 1st Response is just a phone call away. 24/7 Personal Care.
Thursday, March 18, 2010
Spring Cleaning Tips
INSIDE
CLEAN CARPETS as soon as the spring mud season is over. Vacuum them thoroughly, then shampoo with a spray foam or powder or rent a steamer from a hardware store for an even deeper clean.
CLEAN AND VENTILATE THE BASEMENT. Open windows and give your cellar a good airing, then sweep the area thoroughly or vacuum.
START UP YOUR DEHUMIDIFIER. Clean it, make sure that it's in working order, then run it in a humid basement or partially underground room. Dampness during spring and summer months causes mildew.
OUTSIDE
IF YOU HAVE A SWIMMING POOL, ensure that cleaning equipment is in good shape and your water-testing kit is complete. Stock up on chemicals. If you lowered the water level in the fall, fill the pool now.
PUT UP WINDOW BOXES. Dump out old soil and clean the boxes thoroughly. Line wooden boxes with garbage bags to protect them from moisture. Make sure there are drainage holes. Replant with potting soil.
INSTALL WINDOW-UNIT AIR CONDITIONERS. Carefully go over the unit with the brush attachment of your vacuum. Remove and wash the filter and let it dry completely, then reinstall it.
FERTILIZE YOUR LAWN A high-nitrogen fertilizer should be applied twice a year, once in spring and again later in fall. If a weed killer is needed, try an organic brand.
1st Response
Restoration and Reconstruction Specialists
Water - Fire - Smoke - Mold
CLEAN CARPETS as soon as the spring mud season is over. Vacuum them thoroughly, then shampoo with a spray foam or powder or rent a steamer from a hardware store for an even deeper clean.
CLEAN AND VENTILATE THE BASEMENT. Open windows and give your cellar a good airing, then sweep the area thoroughly or vacuum.
START UP YOUR DEHUMIDIFIER. Clean it, make sure that it's in working order, then run it in a humid basement or partially underground room. Dampness during spring and summer months causes mildew.
OUTSIDE
IF YOU HAVE A SWIMMING POOL, ensure that cleaning equipment is in good shape and your water-testing kit is complete. Stock up on chemicals. If you lowered the water level in the fall, fill the pool now.
PUT UP WINDOW BOXES. Dump out old soil and clean the boxes thoroughly. Line wooden boxes with garbage bags to protect them from moisture. Make sure there are drainage holes. Replant with potting soil.
INSTALL WINDOW-UNIT AIR CONDITIONERS. Carefully go over the unit with the brush attachment of your vacuum. Remove and wash the filter and let it dry completely, then reinstall it.
FERTILIZE YOUR LAWN A high-nitrogen fertilizer should be applied twice a year, once in spring and again later in fall. If a weed killer is needed, try an organic brand.
1st Response
Restoration and Reconstruction Specialists
Water - Fire - Smoke - Mold
Tuesday, March 16, 2010
Getting Rid of Water Damage
If your home is ravaged by water damage, here are some things you can do to fix the situation.
•Find the source of the water and fix it. Most often, water damage comes from leaks from pipes or drainage. Get yourself one of those cement glues specifically made for covering up leaky pipes and you should do fine. Remember to turn off your water source first before trying to find and fix the leak.
•Get rid of any excess water. You can do this by simply mopping the entire wet area. If mops don't work, then try using a vacuum cleaner. Do this as quickly as possible. The faster you can clean the water up, the less likely it is mold and mildew will develop. If the water damage is particularly large, take pictures of the damage prior to cleaning it up for the insurance company to cover.
•Let in proper ventilation or turn up the air conditioner. Doing so will prevent the growth of molds and mildew. Proper ventilation will also cause cloth or cloth-like fibers to dry faster if the water damage has affected them.
•Call in the professionals. The best way to get rid of water damage is to hire professional cleaners. They will assure that your home and furniture will be handled with the utmost care.
Water damage to your house should never be taken lightly. Your house is one of your biggest investments. You should take care of it so it will remain standing, clean, and intact.
•Find the source of the water and fix it. Most often, water damage comes from leaks from pipes or drainage. Get yourself one of those cement glues specifically made for covering up leaky pipes and you should do fine. Remember to turn off your water source first before trying to find and fix the leak.
•Get rid of any excess water. You can do this by simply mopping the entire wet area. If mops don't work, then try using a vacuum cleaner. Do this as quickly as possible. The faster you can clean the water up, the less likely it is mold and mildew will develop. If the water damage is particularly large, take pictures of the damage prior to cleaning it up for the insurance company to cover.
•Let in proper ventilation or turn up the air conditioner. Doing so will prevent the growth of molds and mildew. Proper ventilation will also cause cloth or cloth-like fibers to dry faster if the water damage has affected them.
•Call in the professionals. The best way to get rid of water damage is to hire professional cleaners. They will assure that your home and furniture will be handled with the utmost care.
Water damage to your house should never be taken lightly. Your house is one of your biggest investments. You should take care of it so it will remain standing, clean, and intact.
Signs of Water Damage
Does your house have any water damage?
Check for these warning signs right away so you can identify and stop the problem before it gets worse.
•Standing water on the floor. The most obvious sign of impending water damage are pools of water on the floor, most usually in the kitchen. These pools of water indicate that there's a continuous leak somewhere and it has been escaping the normal process of evaporation. If you've already mopped up standing water on your floor and then find some again the next couple of days, then put the mop aside and start looking for leaks or drips. You can mop all you want but as long as you don't fix the source, you will always end up doing the same thing. Your floor will also get damaged day after day.
•Indicators in the house's structure. If your floor begins to buckle slightly, then water is probably present. The reason for this is that vinyl floors are laid over particleboard underlayment that absorbs water and then swells up. If you have hardwood floors, water cups up around the tongue-and-groove joints.
The most common area where water damage is seen is the bathroom in front of the tub or shower --- the damage can occur from splashing or where people step in and out with dripping feet. Keep an eye out for any buckling.
For drywall, check for a discolored or slightly swollen appearance since drywall softens and breaks down.
•Appearance of stains. Next to standing water, the appearance of stains in several parts of your house is a good indication that you have a leak or water encroachment somewhere. The stains may appear:
•Around the windows or on the bottom of the exterior doors, indicating that the water is coming from the outside;
•At the joint between the exterior wall and the ceiling --- it can also mean an ice-damming problem;
•Anywhere in the ceiling, which is almost an indication of a roof leak, unless you have installed water lines in your attic. If you see stains on your ceiling, remember that it does not mean the leak is right above it. Usually, it originates higher and just drips down.
•In cabinets that house a sink --- an indication of a leak in the sink drain system or from the trap.
•Where there are mildew and mold stains. While not exactly definitive proof of a leak, the presence of mildew or molds indicates moisture. In a bathroom where moisture is prevalent, it's an indication that you just don't have enough ventilation to rid the room of mildew. If you see them at the bottom of an exterior wall, it might mean that water is coming in. In closets or places where there is little or no air circulation present, it could mean an overly damp crawl space.
Check for these warning signs right away so you can identify and stop the problem before it gets worse.
•Standing water on the floor. The most obvious sign of impending water damage are pools of water on the floor, most usually in the kitchen. These pools of water indicate that there's a continuous leak somewhere and it has been escaping the normal process of evaporation. If you've already mopped up standing water on your floor and then find some again the next couple of days, then put the mop aside and start looking for leaks or drips. You can mop all you want but as long as you don't fix the source, you will always end up doing the same thing. Your floor will also get damaged day after day.
•Indicators in the house's structure. If your floor begins to buckle slightly, then water is probably present. The reason for this is that vinyl floors are laid over particleboard underlayment that absorbs water and then swells up. If you have hardwood floors, water cups up around the tongue-and-groove joints.
The most common area where water damage is seen is the bathroom in front of the tub or shower --- the damage can occur from splashing or where people step in and out with dripping feet. Keep an eye out for any buckling.
For drywall, check for a discolored or slightly swollen appearance since drywall softens and breaks down.
•Appearance of stains. Next to standing water, the appearance of stains in several parts of your house is a good indication that you have a leak or water encroachment somewhere. The stains may appear:
•Around the windows or on the bottom of the exterior doors, indicating that the water is coming from the outside;
•At the joint between the exterior wall and the ceiling --- it can also mean an ice-damming problem;
•Anywhere in the ceiling, which is almost an indication of a roof leak, unless you have installed water lines in your attic. If you see stains on your ceiling, remember that it does not mean the leak is right above it. Usually, it originates higher and just drips down.
•In cabinets that house a sink --- an indication of a leak in the sink drain system or from the trap.
•Where there are mildew and mold stains. While not exactly definitive proof of a leak, the presence of mildew or molds indicates moisture. In a bathroom where moisture is prevalent, it's an indication that you just don't have enough ventilation to rid the room of mildew. If you see them at the bottom of an exterior wall, it might mean that water is coming in. In closets or places where there is little or no air circulation present, it could mean an overly damp crawl space.
Subscribe to:
Posts (Atom)